Windows Live POP3 Email Setup
How to setup Windows Live Mail for use with a Seaside email address (POP3).
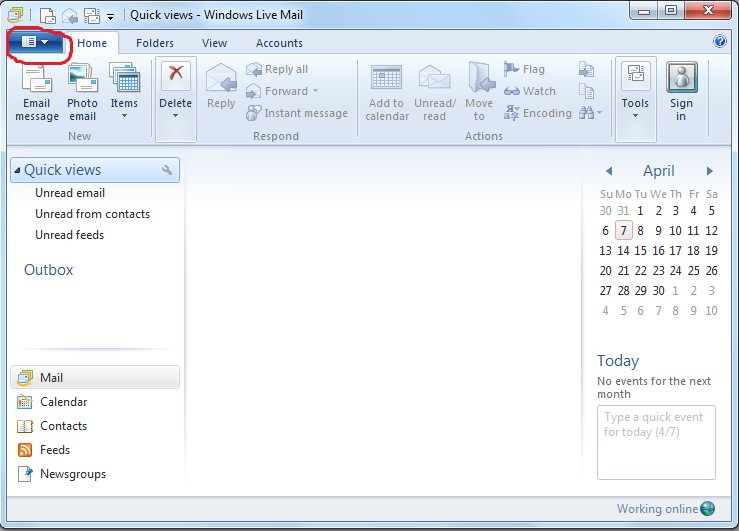
1) Click the "File" dropdown menu.
Click the image for a larger view.
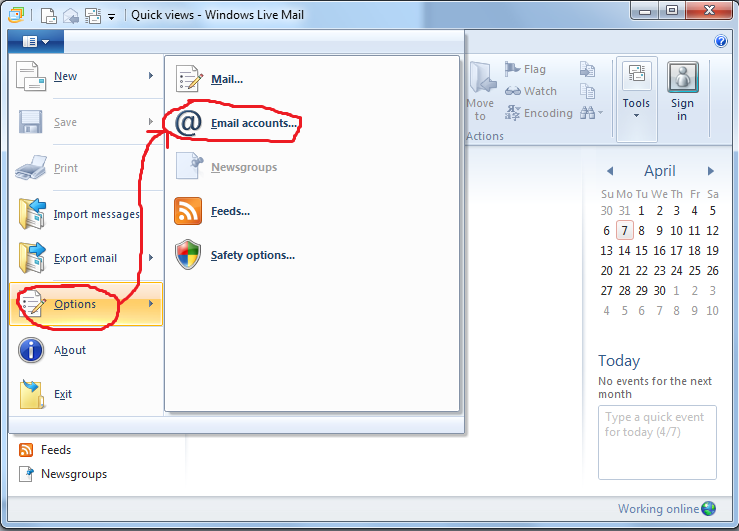
2) Click "Options", then click "Email Accounts..."
Click the image for a larger view.
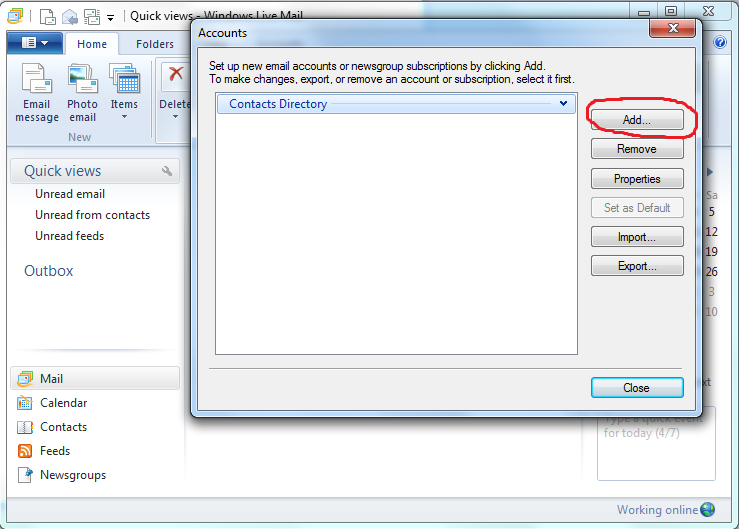
3) Click "Add..."
Click the image for a larger view.
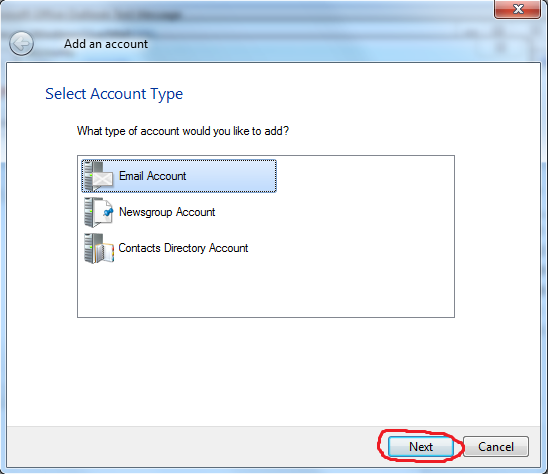
4) Click "Email Account" and then click "Next."
Click the image for a larger view.
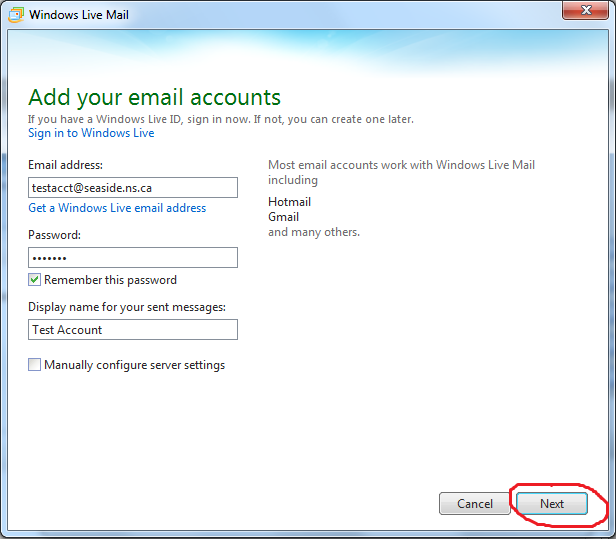
5) Fill in "Email Address", "Password", "Display Name". Click "Next".
Click the image for a larger view.
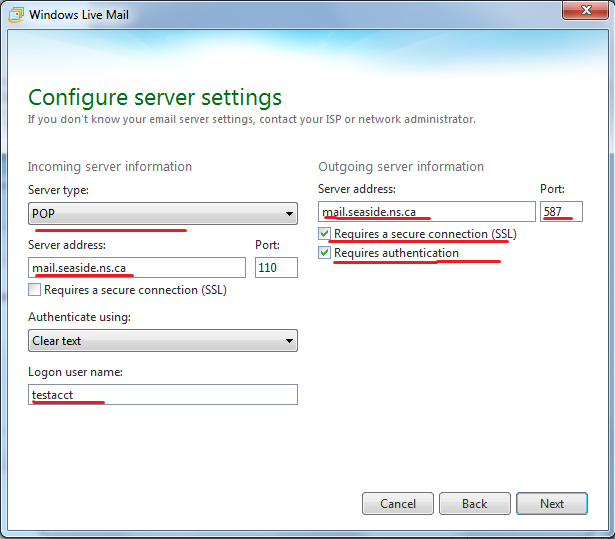
6) Choose "POP" for Server type
- Fill in incoming and outgoing server addresses.
- Click check boxes for "Requires a secure connection (SSL)" and "Requires Authentication" under the Outgoing server address field
- Fill in "587" in the Port number field.
- Click Next
Click the image for a larger view.
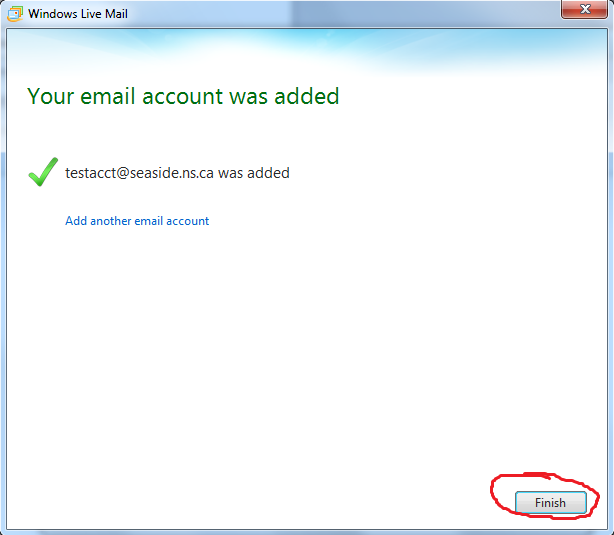
7) Click "Finish"
Click the image for a larger view.
